

How to Run an AI Agent on a VPS: Step-by-Step Production Guide
Learn how to run an AI agent on a VPS with a practical deployment workflow. This guide covers Ubuntu setup, Docker installation, environment variables, persistent storage, automatic restarts, monitoring, and essential security steps for keeping your AI agent online.
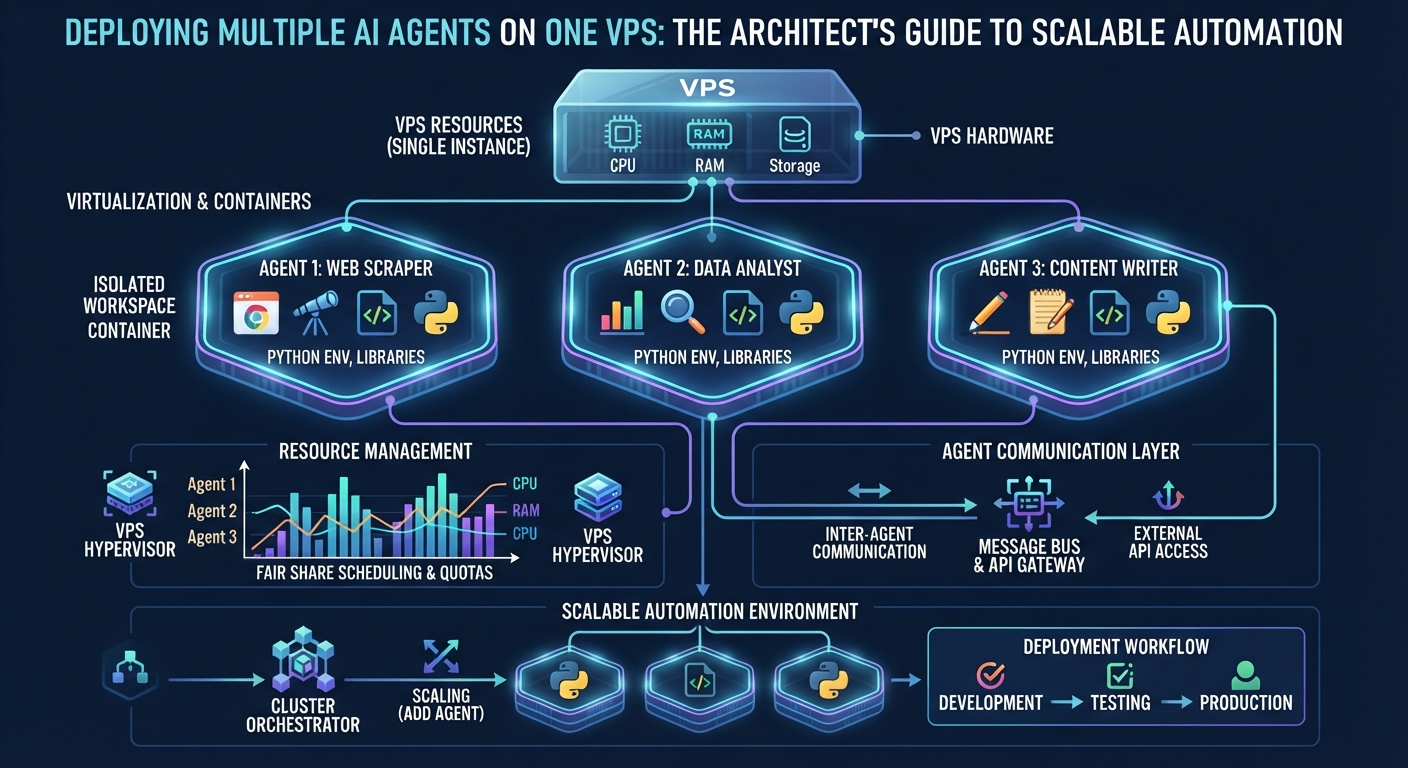
Running an AI agent on your laptop is a convenient way to experiment. But what happens when you want it to answer messages overnight, process incoming webhooks, run scheduled tasks, or continue working while your computer is turned off?
That is where a Virtual Private Server (VPS) becomes useful.
A VPS gives your AI agent a persistent environment that can stay online around the clock. You can install its dependencies, connect it to an AI model provider, store application data, and manage it as a long-running service.
In this guide, you'll learn how to run an AI agent on a VPS using Ubuntu and Docker. We'll cover the deployment workflow, environment variables, persistent storage, automatic restarts, basic security, and monitoring.
The examples are designed for a general Python-based agent. The same principles can be adapted to Node.js applications and other agent frameworks.
What You Need Before Deploying an AI Agent
Before connecting to your server, make sure you have the following:
- A VPS with a supported Linux distribution, such as Ubuntu 24.04 LTS.
- SSH access to the server.
- Your AI agent's source code or project repository.
- The dependencies required by your agent.
- An API key if your agent uses an external LLM provider.
- A basic understanding of environment variables and application configuration.
You should also know whether your agent uses an external model API or runs a model locally.
An API-based agent sends requests to a provider such as OpenAI, Claude, or Gemini. In that architecture, the VPS runs the agent application and its supporting services; the provider handles model inference.
A locally hosted model has different hardware requirements and may need substantially more RAM, storage, or GPU resources.
For a broader breakdown of server sizing, see our guide to AI agent server requirements.
Step 1: Prepare Your VPS
Start by choosing a VPS with enough resources for your complete application, not just the agent process.
Think about everything that will run alongside the agent:
- The operating system.
- The agent runtime.
- Docker containers.
- Databases or queues.
- Background workers.
- Browser automation, if required.
- Logs and stored files.
A lightweight agent that mainly calls external APIs may need relatively modest resources. An agent that runs several browser sessions or multiple supporting services will need more capacity.
Once your VPS is ready, connect through SSH:
ssh username@YOUR_SERVER_IP
Replace username with your server account and YOUR_SERVER_IP with the actual server address.
Update the operating system packages:
sudo apt update
sudo apt upgrade -y
Use a regular administrative account rather than running your application as the root user. Keep SSH access protected, preferably with key-based authentication, and apply security updates regularly.
Step 2: Configure Basic Firewall Protection
A server should not expose every service to the public internet.
Ubuntu includes UFW, a firewall management tool that can help control incoming connections.
Before enabling it, allow your SSH connection:
sudo ufw allow OpenSSH
sudo ufw enable
sudo ufw status
If SSH uses a custom port, allow that port instead of relying on the default OpenSSH profile.
If your agent provides a public API or receives webhooks, you may also need a reverse proxy and HTTPS. In a typical setup, the reverse proxy accepts public web traffic and forwards requests to the agent through a private server network.
Important Docker firewall note: Docker's published container ports can bypass some UFW rules. Do not assume that enabling UFW automatically protects every port published by Docker. Review Docker's official guidance on packet filtering and firewalls and configure your firewall rules accordingly.
For a worker that only makes outbound API requests and does not accept inbound connections, you may not need to publish any application port at all.
Step 3: Install Docker and Docker Compose
Docker packages your agent and its dependencies into a container. This makes the deployment easier to reproduce and manage.
Docker Compose lets you define the application and its configuration in a single YAML file.
For Ubuntu, follow the official Docker Engine installation guide. Use the official package repository method rather than an unofficial installation script for a production server.
After installation, check that Docker is running:
sudo systemctl status docker
Verify Docker:
sudo docker run hello-world
Check Docker Compose:
sudo docker compose version
Docker's official Compose installation guide explains how to install the Compose plugin if it is missing.
Step 4: Upload Your AI Agent Project
Your server needs the application code before it can run the agent.
You can download your project from a Git repository:
git clone YOUR_REPOSITORY_URL
cd YOUR_PROJECT_DIRECTORY
Or transfer the project from your local computer using a secure file transfer method such as SCP.
A simple Python project might look like this:
my-ai-agent/
├── main.py
├── requirements.txt
├── Dockerfile
├── compose.yaml
├── .env
├── .dockerignore
└── data/
Your actual project may contain more files, modules, configuration folders, or database components. Keep the existing project structure when adapting these examples.
Before deployment, make sure the agent works in a test environment and that you know which file starts the application.
In this example, the startup command is:
python main.py
If your project uses a different entry point, replace this command in the Dockerfile later.
Step 5: Create a Dockerfile
A Dockerfile tells Docker how to build the environment that runs your agent.
For a Python-based project, you can use this as a starting template:
FROM python:3.12-slim

ENV PYTHONDONTWRITEBYTECODE=1
ENV PYTHONUNBUFFERED=1

WORKDIR /app

RUN groupadd --gid 10001 agent && \
    useradd --uid 10001 --gid agent \
    --no-create-home --shell /usr/sbin/nologin agent

COPY requirements.txt .

RUN pip install --no-cache-dir -r requirements.txt

COPY --chown=agent:agent . .

USER agent

CMD ["python", "main.py"]
This template does several things:
- Uses a lightweight Python base image.
- Creates an application directory.
- Installs the dependencies listed in
requirements.txt. - Copies the application files into the image.
- Runs the application as a non-root user.
- Starts the agent through
main.py.
Your requirements.txt must contain the actual dependencies used by your project. Pin and test dependency versions rather than blindly installing the newest versions on every deployment.
If your agent uses Node.js, another runtime, or a framework with special system dependencies, adapt the base image and build instructions accordingly.
Step 6: Protect API Keys and Configuration
Most API-based AI agents need credentials to connect to model providers and other services.
Never place API keys directly in your source code or Dockerfile.
For a simple single-server deployment, you can keep configuration in a separate .env file:
LLM_API_KEY=replace_with_your_real_key
AGENT_ENV=production
Replace the example value with your actual credential and add only the variables your application needs.
Restrict access to the file:
chmod 600 .env
Make sure .env is excluded from version control. Add it to .gitignore and .dockerignore so that credentials are not accidentally committed or copied into the image.
Docker Compose supports environment files, but environment variables can still be exposed to processes or logs. For production workloads with sensitive credentials, consider Docker Compose secrets or a dedicated secrets manager. See the official Docker Compose secrets guide.
A useful rule is to give each application only the credentials and permissions it actually needs.
Step 7: Configure Docker Compose
Now create a compose.yaml file in your project directory.
The following example is suitable as a starting point for an agent that runs as a background worker and does not need a publicly exposed port:
services:
  agent:
    build: .
    container_name: my-ai-agent
    restart: unless-stopped
    init: true

    env_file:
      - .env

    volumes:
      - ./data:/app/data

    security_opt:
      - no-new-privileges:true
Here is what the important settings do:
build: Builds the container image using your Dockerfile.
container_name: Gives the container a recognizable name.
restart: unless-stopped: Tells Docker to restart the container automatically after many unexpected exits or a server restart, unless you deliberately stopped it.
init: true: Uses a small init process to help manage child processes inside the container.
env_file: Loads configuration values from the .env file.
volumes: Keeps the application's data in a persistent directory on the VPS rather than relying only on the container's writable layer.
no-new-privileges: Adds a security restriction that prevents processes from gaining additional privileges through certain mechanisms.
The example deliberately does not publish a network port. If your agent needs to receive webhooks or serve an API, configure an appropriate application endpoint and put it behind a properly secured reverse proxy.
If your container needs to write to the mounted data directory, make sure the host directory has appropriate ownership and permissions for the container's application user.
Docker explains production-oriented Compose configuration in its guide to using Compose in production.
Step 8: Build and Start Your AI Agent
Once your project files are ready, validate the Compose configuration:
sudo docker compose config
Build the image and start the service:
sudo docker compose up -d --build
Check the running containers:
sudo docker compose ps
If the container is running, Docker should show it as active.
Now inspect the application logs:
sudo docker compose logs -f agent
This is an important step. A container can start successfully while the agent itself fails because of an invalid API key, missing dependency, incorrect configuration, or application error.
Look for a clear application startup message and confirm that the agent can reach the services it needs.
Press Ctrl + C to stop following the logs. This does not stop the running container.
Step 9: Make Sure the Agent Can Recover
A production AI agent should not depend on someone manually starting it every time the application exits.
The Compose configuration above uses:
restart: unless-stopped
This provides a basic automatic restart policy.
However, automatic restarts are not a complete monitoring system. They cannot fix broken application logic, invalid credentials, exhausted API quotas, or a service that remains alive but stops processing jobs.
For more reliable deployments, consider adding:
- An application health endpoint or health check.
- Alerts when the agent stops responding.
- Error reporting.
- A queue for background tasks.
- Retry limits for temporary API failures.
- A clear process for handling failed jobs.
Only add a Docker health check when your application has a meaningful health endpoint or command. A generic health check that does not match the application can report misleading results.
One more important detail: when you change Compose configuration or environment values, use:
sudo docker compose up -d
Do not rely on docker compose restart to apply changes to the Compose file. Docker documents that restarting an existing container does not apply updated configuration or environment variables.
Step 10: Test the Agent Under Real Conditions
A successful deployment is more than seeing a container marked as running.
Test the actual workflows your users or integrations will depend on.
For example:
- Send a real test request to the agent.
- Confirm that the agent can reach its model provider.
- Check that tool integrations work.
- Verify that the agent can write and retrieve persistent data.
- Test how it handles a failed API request.
- Restart the container and confirm that it recovers.
- Reboot the VPS during a planned maintenance test and verify that the service starts again.
If your agent processes incoming webhooks, test the complete flow from the external service to your VPS and back.
For business-critical workflows, test duplicate events as well. Your application should avoid performing the same action twice when a provider retries a webhook or a job is submitted again.
Step 11: Monitor Logs and Resource Usage
Once the agent is running, monitoring helps you identify problems before they become serious.
Use the following commands to inspect your deployment.
Check container status:
sudo docker compose ps
View recent logs:
sudo docker compose logs --tail=100 agent
Follow logs in real time:
sudo docker compose logs -f agent
Monitor CPU and memory usage:
sudo docker stats
Check disk space:
df -h
Check memory:
free -h
Pay particular attention to:
- Repeated API errors.
- Authentication failures.
- Unexpected container restarts.
- Memory usage increasing over time.
- Disk space consumed by logs or stored files.
- Jobs that remain pending for too long.
For an agent that runs continuously, it is also useful to record task success rates, response times, failed jobs, and API usage. These application-level metrics often reveal problems that basic server monitoring cannot detect.
Step 12: Keep Your Agent Updated and Backed Up
An AI agent is an application, not a one-time server installation.
You should maintain its code, dependencies, container images, and supporting services.
A simple update workflow for a project built from local source code is:
git pull
sudo docker compose up -d --build
Use this only after reviewing and testing the changes. For important production systems, deploy updates during a planned maintenance window and keep a rollback option.
Back up data that would be difficult to recreate, including:
- Agent configuration.
- Persistent application data.
- Database files or database backups.
- Important workflow definitions.
- Required integration settings.
Do not assume that a Docker image is a backup of your application data. Container images and persistent volumes serve different purposes.
Test your restore process periodically. A backup that has never been restored is not a verified recovery plan.
Common Problems When Running an AI Agent on a VPS
The container starts and then exits
Check the logs:
sudo docker compose logs --tail=100 agent
Look for missing packages, an incorrect startup command, configuration errors, or failed API authentication.
The agent cannot connect to the AI provider
Check outbound network connectivity, DNS resolution, API credentials, provider status, and any restrictions applied to your server.
The agent loses its memory after restarting
Check whether the application stores important state inside the container filesystem.
Use a persistent volume or a properly managed database for data that must survive container replacement.
The server runs out of memory
Check current usage:
sudo docker stats
free -h
Look for excessive concurrent jobs, browser processes, memory leaks, or unnecessary services. Reduce concurrency or increase server resources when monitoring shows that the workload needs more capacity.
The agent is running but does not process tasks
A running container only confirms that its process is alive. Check the application's own logs, job queue, integration connections, scheduler, and health endpoint.
Frequently Asked Questions
Can I run an AI agent on a VPS 24/7?
Yes. A VPS can keep your agent's application running continuously, provided the server, network, dependencies, and external services remain available. Use a process manager or container restart policy and monitor the application.
Do I need Docker to run an AI agent on a VPS?
No. You can install the runtime directly on the server and manage it with a service manager such as systemd. Docker is useful because it packages dependencies and makes deployment more consistent across environments.
Do I need a GPU to run an AI agent on a VPS?
Not necessarily. If your agent sends requests to an external LLM API, the model inference happens on the provider's infrastructure. A GPU becomes relevant when you want to run a compatible model locally.
Can I run a Python or Node.js AI agent on a VPS?
Yes. A VPS can host Python and Node.js applications, provided the operating system, runtime versions, dependencies, and server resources are compatible with your project.
Will my AI agent restart automatically after a VPS reboot?
It can. Configure a suitable service manager or Docker restart policy, then test recovery after a planned reboot. Do not assume that the setting is working until you have verified it.
Can I run multiple agents on one VPS?
Yes, if the server has enough CPU, memory, storage, and network capacity for the combined workload. Separate containers and clear resource limits can help organize the services.
Is a VPS suitable for production AI agents?
A VPS can be suitable for many production agents, especially API-based agents and automation services. Production readiness also depends on security, monitoring, backups, error handling, availability requirements, and the quality of the application itself.
Final Thoughts
Learning how to run an AI agent on a VPS is not only about starting a Python or Node.js process. A reliable deployment needs persistent data, protected credentials, automatic recovery, useful logs, monitoring, and a tested update process.
Docker and Docker Compose provide a practical foundation for packaging and managing an agent, while Ubuntu gives you a flexible server environment.
Start with a deployment that matches your actual workload. Test it with realistic requests, monitor how it behaves, and improve reliability before trusting it with important business operations.
Want to spend less time managing server infrastructure?
AgentVPS combines a private VPS with a persistent Personal AI that can help deploy, configure, monitor, and manage applications through a chat-based interface. Explore the platform and see whether it fits the way you want to run your AI workloads.
Was this helpful?
Be the first to like this article Tap the thumb to like this article — you can optionally share more detail afterward.